


Diy Multi Chamber Hideout for Hamsters
Hello! 
So why use a multichamber hide?
Multichamber hides are a great source of enrichment for a hamster's enclosure as it mimics the burrows a hamster would make in the wild. Hamsters are burrowing animals so they need at least 6in of bedding to be able to burrow. But why multichamber hides and not normal hides? Normal hides do not have the sections as a multichamber hide would have to mimic the hamsters burrows in the wild. Multichamber hides add more space enrichment too as they take up less space because they are hidden under the bedding. They can also be used as a stand for a wheel to stop bedding getting caught in the wheel and a water bowl and food dish stand. However these great sources of enrichment are quite costly and hard to find.
So do you want a multichamber hide but can't afford one? If so then follow along![/spoiler]
How to make a multichamber hide:
You need:
a shoe box with a lid (make sure it’s one that’s connected to the box rather than one that lifts off, if you don’t have one of these use sharp scissors to cut off the long end of the lid)
a craft knife
non toxic PVA glue
a cutting board, chopping board, thick cardboard(preferably I cut the table cloth with a craft knife)
masking tape
a little bit of DIY ability
Step 1. Cut off the lid off the shoebox with sharp scissors (careful little children)
Step 2. Using the rest of the box cut off a 19 cm strip (about 7 inches) (refer to as A)it doesn’t have to be precise
Step.3 Using a craft knife cut out a 5cm (2in) please use a cutting mat (I cut through the table cloth right now it’s sealed with tape to hide the rip) hole for the hamster to get through you may need to go larger if your hamster is on the larger size
Step 4. Using PVA glue, squeeze some out onto the cardboard you cut out on the bottom long edge
Step 5. Stick it on the open long end of the shoebox
Step 6 Secure cardboard with masking tape
Step 7. Cut out a 5cm (1in) square (refer to as B), a 20cm long rectangle called C, a 17cm long rectangle called D, an 18 cm long rectangle called E, a 7.5 cm rectangle called F, a 14 cm long rectangle called G
Step 8. Repeat steps 3 to 6 ignore step 5 ,using the Img below as a guideline below
Step 9. Cut a hole that falls into one of the sections big enough or your hammy to go into
Step 10. Gently peel off the tape once glue is dry
Step 11. Paint with non toxic water based paint (optional)
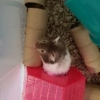
Step 12. Place under bedding and admire your handiwork!


Edited by ♥️fluffy♥️, 11 November 2021 - 11:11 PM.


 although its up to you because its probably a lot of work :")